How to Create a DIY Holiday Wreath in 7 Easy Steps

I try to take inspiration from everywhere for new craft ideas, and this one came from my darling mother-in-law! She found a festive and easy way to create a fall wreath on Pinterest, which made me want one too! So after work the other day I stopped by Michaels and picked up the minimal essentials for my holiday wreath. And the beauty of it is that I can repurpose this wreath for every holiday, namely Christmas, Easter, 4th of July, etc. There is only one permanent aspect to the entire piece, so everything else can be switched out, saved and reassembled through each passing season. And let’s just say I am loving it – so nice to come home to a cheery door!

The Essentials

  1. Wreath: $4.99 from Michaels
  2. Wreath hanger: $2.99 from Michaels
  3. Bow: FREE, left over from my wedding
  4. Wooden initial: $2.99 from Michaels
  5. Decorative leaves: $1.99 from Michaels
  6. Spray paint: $1.97 with 40% off coupon from Michaels
  7. Hot glue gun: $3.99 with 50% off coupon from Michaels

All Your Materials

7 Easy Steps

Tie the Ribbon

First I tied the ribbon on. It has a wire twist-tie on the back that can be readjusted or removed. I’ll leave it on for the Christmas wreath though!

Spray Paint the Letter

Then I spray painted the initial. I wanted to allow ample time for it to dry, so I did this first and then came back to it after the next 2 steps.

Tuck in the Leaves

I then proceeded to tuck in all the leaves. I didn’t want them permanently in place, so utilizing all the twigs and crevices seemed my best bet. It worked well and gave me the flexibility I wanted for finding the right spots for each leaf.

LeavesandRibbon

After putting on all the leaves I tucked in a small gold piece of ribbon, also left over from my wedding. There wasn’t enough to go all the way around though, so it covers the left side – I quite like the asymmetry.

Apply the Hot Glue to the Letter

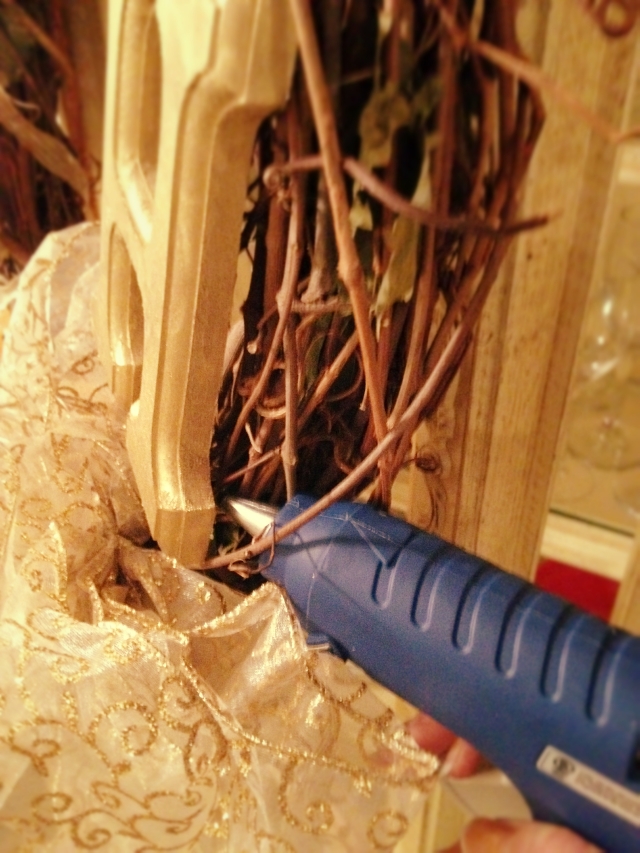
By this point the letter was dry, so I brought it back in from the patio and hot glued the back…all down the left side. (I love the gold color of the H because it fits every season!)

Attach the Letter with a Glue Gun

Then, no-brainer, I attached the letter to the wreath after positioning it in the perfect spot. This is now a permanent feature, which I love.

The Finished Look

And voila! The wreath is complete and now handing gorgeously on my door. And I’m already brainstorming an elaborate idea for Christmas…this first edition was more mellow, as a test run. Next year I may dress it up with pumpkins and who knows what else! If you love this idea, and would like to see other crafty posts, visit my DIY Projects page.

Birthday Food and DIY Decor Essentials

So I promised you two birthday extravaganza posts, and here is the first one! Preparing for my hubby’s surprise birthday dinner and night of jazz was rather tricky – he’s a clever one I tell you. My plan was to have his parents over for dinner – I made the shrimp scampi linguine and his mom brought the salad and dessert. It was too funny the three of us hiding in my tiny kitchen waiting for Aaron to come home from class. And then SURPRISE! Only to find out that my darling abuelo (Aaron’s grandpa) had already spilled the beans to him moments before during a birthday phone call. But, it was a fabulous time all the same!

I was quite proud of myself for keeping the surprise the night before as I frantically cleaned and prepared. See, I decided to set the table early, for four, not two as he had anticipated. Now, being a clever girl, I used the excuse that setting the dinner table for four was purely for the aesthetics of this blog post. Ha! And, thankfully he’s convinced I’m rather OCD anyway, so the veracious cleaning did not phase him.

Fabulous Fiesta Place Settings

Well, needless-to-say, this birthday dinner gave me the perfect opportunity to set the table with the new Fiesta ware we’ve begun accumulating thanks to wedding gifts and gift cards. In addition, with Kohl’s cash we were able to get the four round place mats for free, and the wine glasses added a nice touch – they were wedding gifts as well. Oh how fun it is to build a home and life together – married bliss is fabulous! To finish the look off entirely, I want to make napkins that perfectly compliment the colorful dishes, so that is another upcoming project.

Breakfast in Bed & a DIY Serving Tray

And…the birthday food surprises continued this morning when I made my hubby breakfast in bed. He absolutely loves his mama’s French Toast Casserole, so thanks to Pinterest in all its glory, I found a spin-off of french toast in the form of muffins. I woke up at 7:30 – true dedication for me considering it is a Saturday – and made muffins and coffee. I served his breakkie on a fabulous serving tray that one of my good friends made me as an apartment-warming gift.

And from what she’s said both trays were really easy to make. My understanding of the steps:

  • Pick up a wooden tray from your local craft store
  • Find pictures from magazines, old wallpaper, etc. and decide where to place them
  • Lay the pictures where you want them and cover over with Modge Podge
  • Then decorate the trays with stickers, gems, markers or whatever you’re feeling

One thing I realized from last night and this morning – it is so fun and easy to integrate DIY projects and crafts into your everyday life. Being a large part of the process for Aaron’s birthday surprises was a blast and it made it that much more special! Oh, and family is one of the greatest gifts in life. To see the final (jazzy) surprise I planned and coordinated last night, and the glamorous ensemble I wore, check out my next post here.

UPDATE: Birthday Date Day, Wedding Week & DIY Headboard

Hello friends! Sorry I’ve neglected this dear blog the past week – life just gets so busy sometimes! But, I want to be better, so a content calendar is in the works. With this said, there are a few exciting posts coming up in the next week.

Upcoming Posts

Tomorrow is my hubby’s 23rd b-day, and I already have two posts in mind – one about the diy dinner I have planned and the other covering my fabulous date ensemble, so stay tuned! Then, next week, starting on Monday, will be Wedding Week. I have so many diy crafts, projects and strategies I want to tell you about. I won’t cover EVERYTHING from my wedding, but you’ll get a good flavor of how I took the role of wedding planner. So if you’re planning a diy wedding yourself, or you just dig the girly dream wedding fantasy, then you won’t want to miss it!

DIY Project: Wall Clustered Pseudo-Headboard

In other news, I finally finished what I call my “bedroom memory & photo wall,” or our pseudo headboard – complete with gobs of wedding photos and artifacts. Well, take a look – pictures say it all.

I suppose I’ve been spending a lot of time on our bedroom lately – as evidenced by the wall flowers and decorative pillows from previous posts, in addition to this new touch of chic! I’m personally a large proponent of photo clustering, so that is what I did. Originally, I researched different DIY headboard ideas, but with my love of photos and memorabilia, this memory wall concept came to me. It all started with the three wall cubes, and then it branched out from there. A picture here, a picture there…lots of pictures! I am so happy with the result and plan to add more.

And good news, this is an easy idea you could mimic. There is so much room for you to add personal flair and tailor your photo/memory wall to your individual style. Just compile and add lots of fun statement pieces. If you have a fabulous wall clustering too, or are thinking of creating one, share your thoughts and pictures in the comment section below!

Fireplace Candle Holders and Wall Decor Flowers

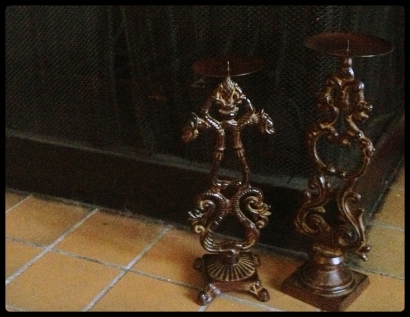
Candle HoldersThis weekend my hubby and I went to our local Goodwill for the first time. There was a sad selection…with the exception of a super rad set of candle holders. I spotted them on a shelf and knew I had to have them. And…it was only $10 for the pair, plus an applied discount from my rewards card. A clear win if I do say so myself! They’ve made their home in front of our fireplace. Now all we need are some candles to go with them.

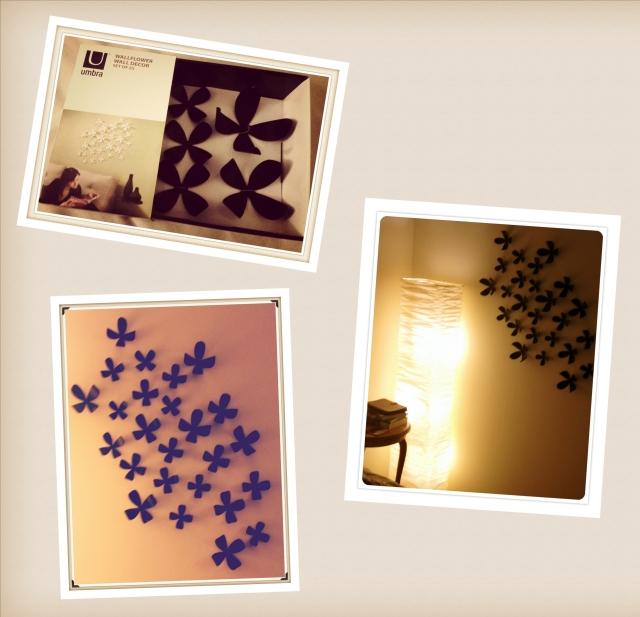
The second fabulous find this weekend was actually a surprise from my husband. He knew I wanted this set of 25 wall flowers from Silver and the City. I may have mentioned it to him a few times (or seven) in the past few months. So, after church we drove to Mass Ave and walked into the store determined to find this lovely little set of wall decor. However, my heart almost broke because we couldn’t find them – they had been on sale for a few months. But, by shear fate, and Aaron’s searching skills, we found the last box of black flowers on a shelf, hidden at the back. I was thrilled, and even more enthused when we rung up at the cash register and the set was only $12.50. I put them up in our bedroom this afternoon and they look wonderful!

Wall Flower Collage